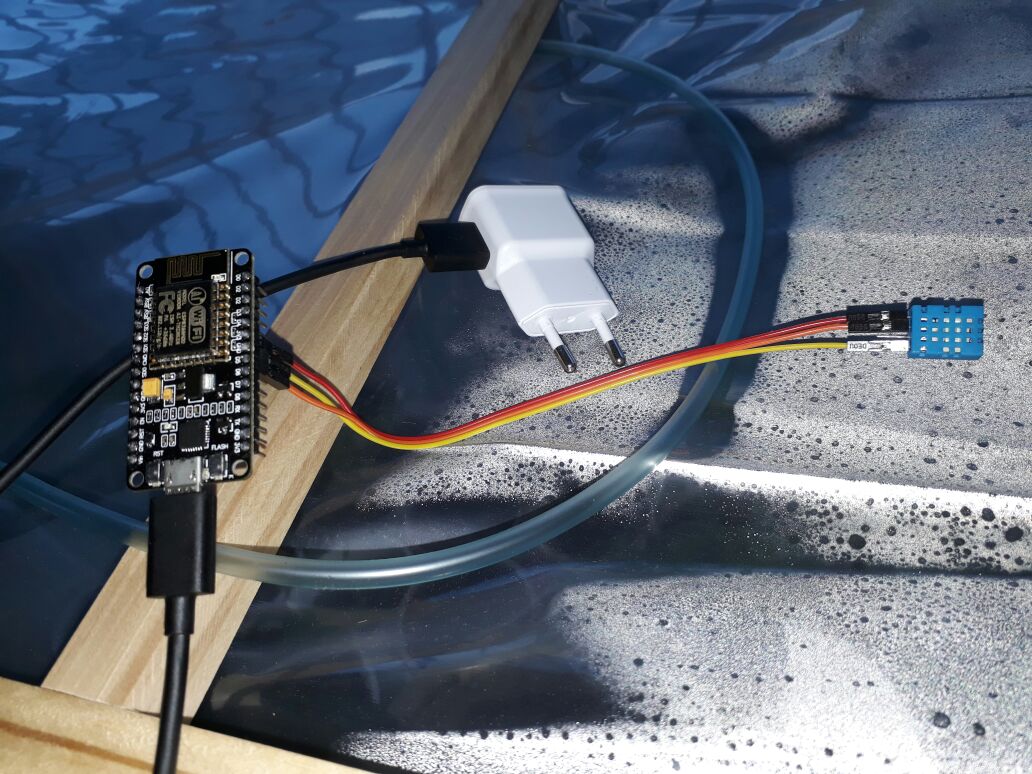
I was using my old multimeter's built in temperature sensor to keep an eye on my little greenhouse. This was cumbersome and the multimeter doesn't support humidity and only runs in Fahrenheit. To replace this I used an ESP8266 ESP 12E WIFI Development Board, DHT11 Digital Temperature Humidity Sensor and a little bit of code.
The ESP8266 range is very good. Great quality, speed, price and easy to program using the Arduino IDE. With the correct libraries, you can connect to wifi and run a little web server to display content to any device with a browser. The idea here was simple. Grab the temp and humidity readings and display them as HTML on a website.

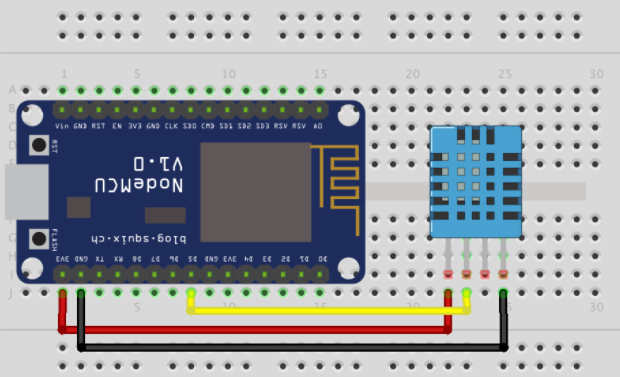
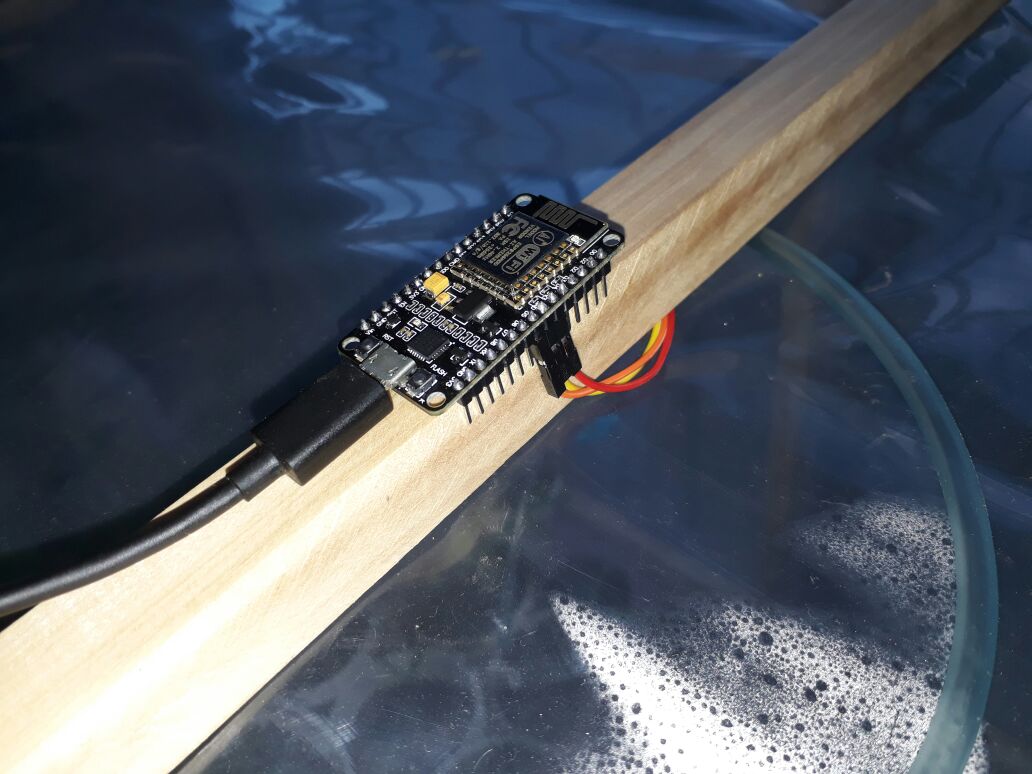
Connect the DHT11 temperature sensor to the 3v3 and ground pins of the ESP8266 Board. Looking from the front of the sensor, the left pin is 3v3, right pin is ground and second from the left is digital IO. In my example, I used the D5 pin for IO. I then used a spare cell phone charger to power the device after all the code is done. That's it.

Here is the code...
//Needed libs.
#include <ESP8266WiFi.h>
#include <WiFiClient.h>
#include <ESP8266WebServer.h>
#include <ESP8266mDNS.h>
#include "DHT.h"

//Sensor IO Pin.
#define DHTPIN D5
//Needed for the sensor lib.
#define DHTTYPE DHT11 // could be DHT22 for better sensor
//Start with sensor object
DHT dht(DHTPIN, DHTTYPE);
//WIFI SSID and Password
const char *ssid = "MYWIFISSID";
const char *password = "WIFIPASSWORD";
//Set webserber port, 80 is the norm
ESP8266WebServer server ( 80 );
//Just set the led to show activity
const int led = 13;

void setup ( void ) {
 dht.begin();//start sensor, GOGOGO
 pinMode ( led, OUTPUT ); //Set LED pin mode
 digitalWrite ( led, 0 ); //Turn off led
 Serial.begin ( 115200 ); //need the serial for debug
 WiFi.begin ( ssid, password ); //Connect to your wifi.. YEA!!!!!!!!!!!
 while ( WiFi.status() != WL_CONNECTED ) {
 //Please hold while we connect....add on hold music?
 delay ( 500 );
 Serial.print ( "." );
 }
//SUCCESS and we show it!!
 Serial.println ( "" );
 Serial.print ( "Connected to " );
 Serial.println ( ssid );
 Serial.print ( "IP address: " );
 Serial.println ( WiFi.localIP() );
 if ( MDNS.begin ( "esp8266" ) ) {
 Serial.println ( "MDNS responder started" );
 }
 server.on ( "/", handleRoot ); //handleRoot is the main function that draws the temp info on screen.. the html builder
 server.on ( "/inline", []() {
 server.send ( 200, "text/plain", "this works as well" ); // This just shows that you can create a URL path called inline and display plain text, not needed.
 } );
 server.onNotFound ( handleNotFound );//Error error error.. This is the function that handles an error..
 server.begin(); //GOGOGOGO
 Serial.println ( "HTTP server started" ); // Just for debugging.
}
void loop ( void ) {
 server.handleClient(); //loops and communicates with clients on the page. so if you wanted to interact etc..
}

void handleRoot() {
//The MAIN MAN!!! Here we get temp and humidity and show on the browser
 digitalWrite ( led, 1 ); //Turn on LED, well, just because...
 char temp[400]; // variable that holds stuff, 400 chars long.
 //set up time to show.
 int sec = millis() / 1000;
 int min = sec / 60;
 int hr = min / 60;
 int h = dht.readHumidity(); //Grab the humidity
 int t = dht.readTemperature(); //and grab the temp in C, becuase who uses F anyhow?
 if (isnan(h) || isnan(t)) {
 //the temp sensors can somtimes be a little slow, so we exit the function and try again if we dont get a reading.
 Serial.println("Failed to read from DHT sensor!");
 return;
 }
 float hic = dht.computeHeatIndex(t, h, false); //This is to do with the temp and humidity calculations..not tooo sure why.
 // YAY!!!!!!!!!! now we build the html to show on the screen.
 snprintf ( temp, 400,
 "<html>\
 <head>\
 <meta http-equiv='refresh' content='5'/>\
 <title>ESP8266 Demo</title>\
 <style>\
 body { background-color: #cccccc; font-family: Arial, Helvetica, Sans-Serif; Color: #000088; }\
 </style>\
 </head>\
 <body>\
 <h1>Greenhouse Temp / Humidity</h1>\
 <p>Uptime: %02d:%02d:%02d</p>\
 <h2>Temp: %d</h2>\
 <h2>Humidity: %d</h2>\
 </body>\
 </html>",
 hr, min % 60, sec % 60, t, h
 );
 server.send ( 200, "text/html", temp ); // SEND TO SCREEN
 digitalWrite ( led, 0 ); // WE ARE DONE NOW, so we can turn off the led.
 }
void handleNotFound() {
 //when things dont work, its nice to get . a little INFO
 digitalWrite ( led, 1 );
 String message = "File Not Found\n\n";
 message += "URI: ";
 message += server.uri();
 message += "\nMethod: ";
 message += ( server.method() == HTTP_GET ) ? "GET" : "POST";
 message += "\nArguments: ";
 message += server.args();
 message += "\n";
 for ( uint8_t i = 0; i < server.args(); i++ ) {
 message += " " + server.argName ( i ) + ": " + server.arg ( i ) + "\n";
 }
 server.send ( 404, "text/plain", message );
 digitalWrite ( led, 0 );
}
Some links to the libraries you will need.
ESP8266
Sensor
Tutorial to get ESP8266 ESP-12E NodeMCU working on Arduino IDE

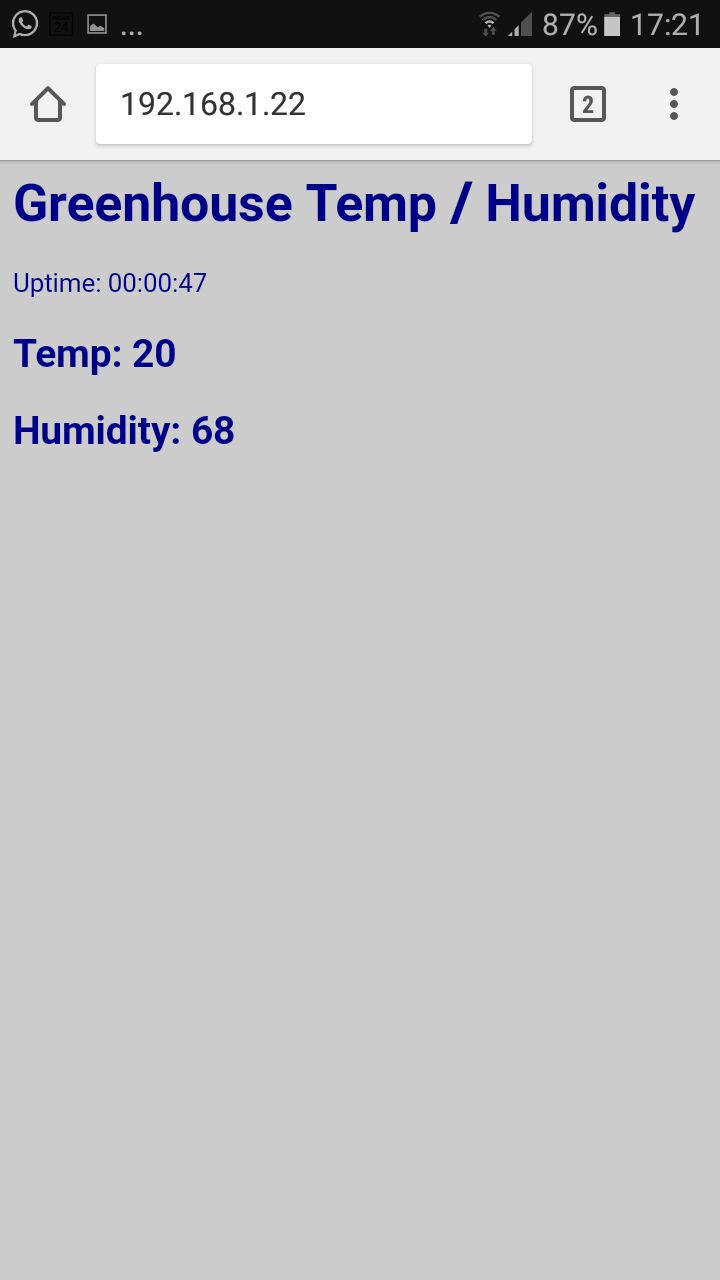
The result from my phone.

What next?
Next, I plan to connect a relay board to this and perhaps a servo. The servo to open and close a flap for humidity control, and the relay for some sort of heater. I could also connect a grow light and light sensor later. With a powerful dev board like the ESP8266 ESP 12E, the sky is the limit.


Comments (1)
I am appreciate your efforts for writing such a post which consist all the relevent info about the topic.
2018-12-22 06:57:04